Nomin Khishigsuren

Hello, my name is Nomin and I am a recent M.Sc. graduate from University of Wisconsin-Madison in Mechanical Engineering. I am a passionate researcher and engineer who loves working with data, machine learning and design to make an impact on people's lives and contribute to society.
My portfolio showcases projects I have worked on in the past two years during graduate school, most notably my contribution to traumatic brain injury (TBI) research. When I am not focusing on work, I am pushing myself creatively by writing poetry, sketching, painting and solving crossword puzzles.
View My LinkedIn Profile
2D Uni-axial Tension Device
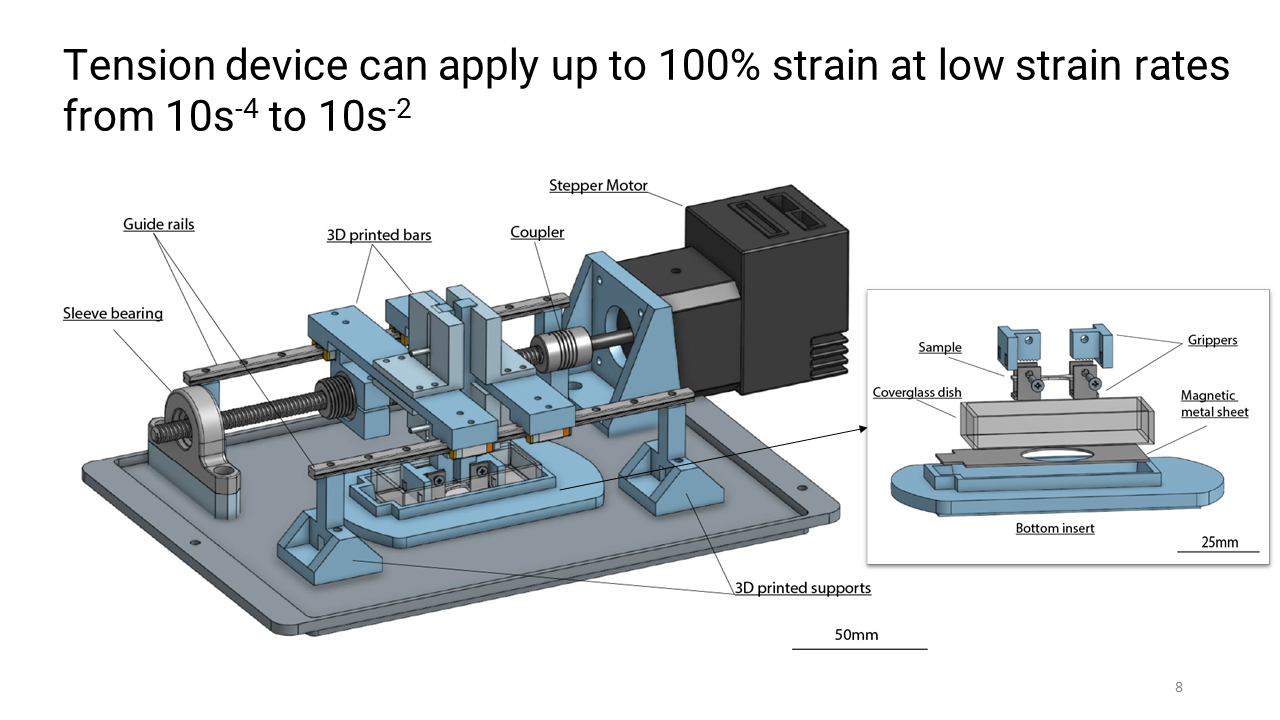
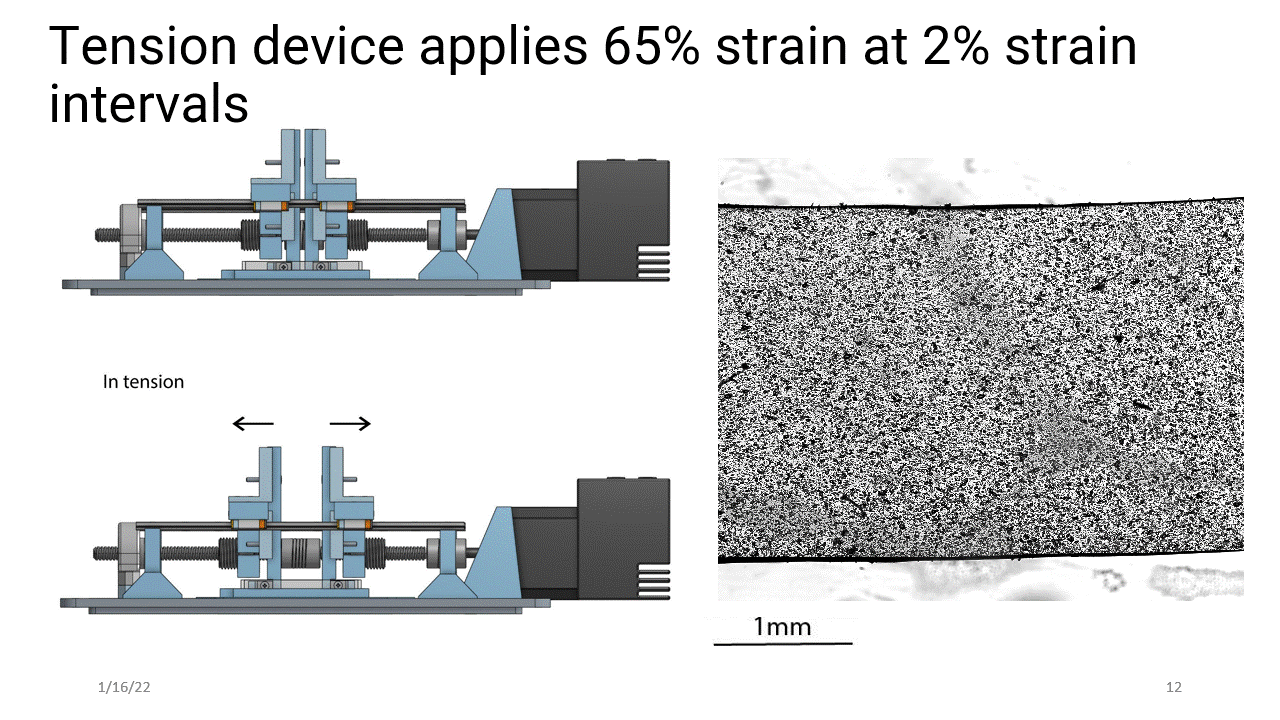
Here is the diagram of the tension device. The bottom plate is designed such that it fits directly onto the microscope for so you can easily image. The device’s main power unit is an integrated stepper motor. The stepper rotates a lead screw that is connected to the shaft by couplers and is held by a mounted sleeve bearing at its end. I also have these two guide rails that support these 3D printed mounts which hold the rods that stretch the sample.
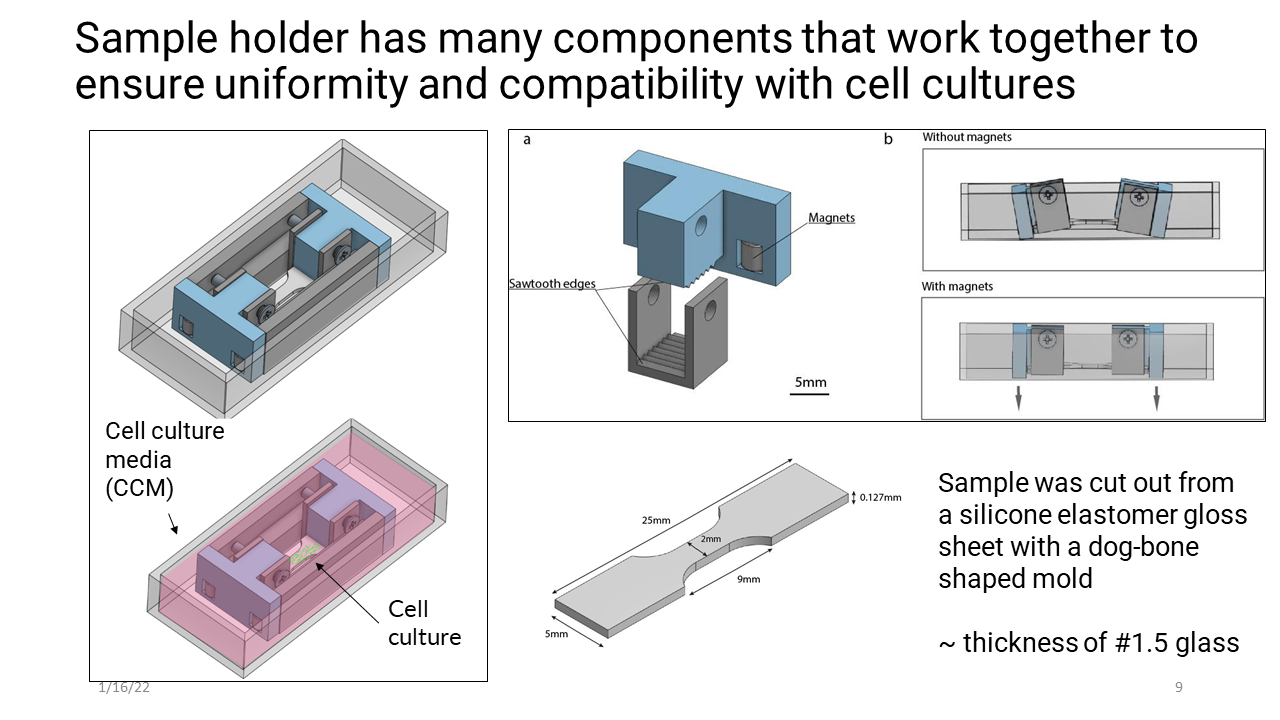
Sample holder showcases a lot of design choices that were made to accommodate compatibility with cell cultures such as using the coverglass dish (as shown below) that can hold cell culture media (CCM) and grippers that fit into the dish. The grippers themselves work as a clamp with sawtooth edges so that it holds the sample in place during tension. It also contains magnets so that the grippers stay level. Without it, the grippers tend to rotate upwards due to its moment of inertia. The sample itself was cut from a 0.005 inch or 0.127mm thick silicone elastomer gloss sheet using a dog-bone shaped mold. The thickness of this sample comparable to that of #1.5 glass which is desirable for imaging on a microscope. All these components work together to make sure that the strain being applied to the sample is uniform.
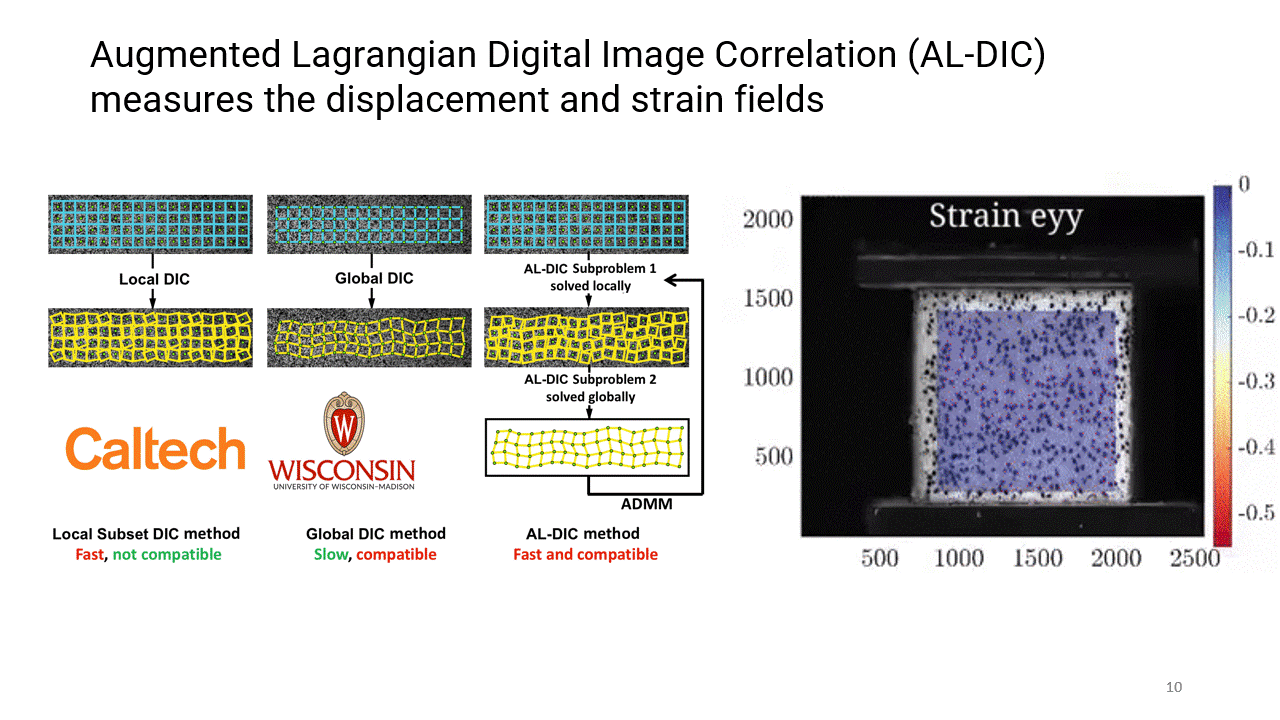
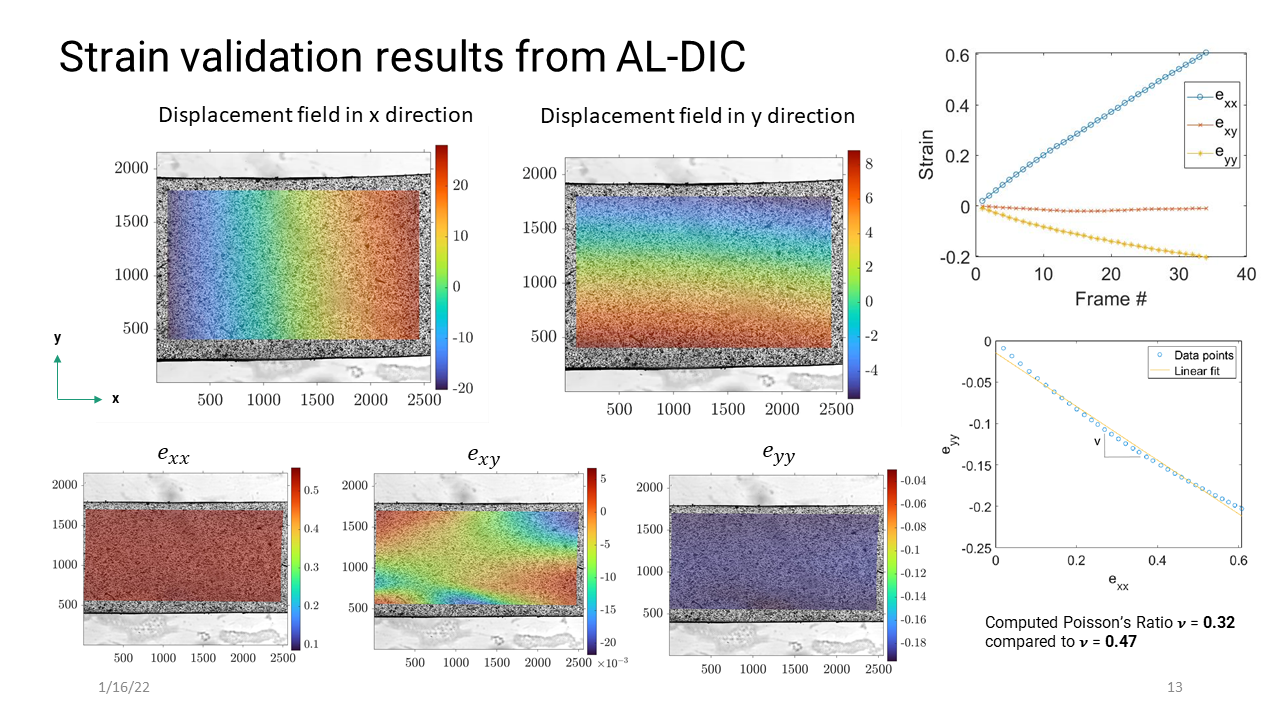
So the next question was how can I validate this device and make sure it is stretching the sample the way it was programmed to? The answer was using Digital Image Correlation (DIC). DIC is an experimental technique that measures full-field displacement and strain fields by analyzing digital images of a sample before and after deformation. In this case, I used Augmented Lagrangian Digital Image Correlation (AL-DIC) that was developed by Jin, who is a Postdoc in Franck Lab.
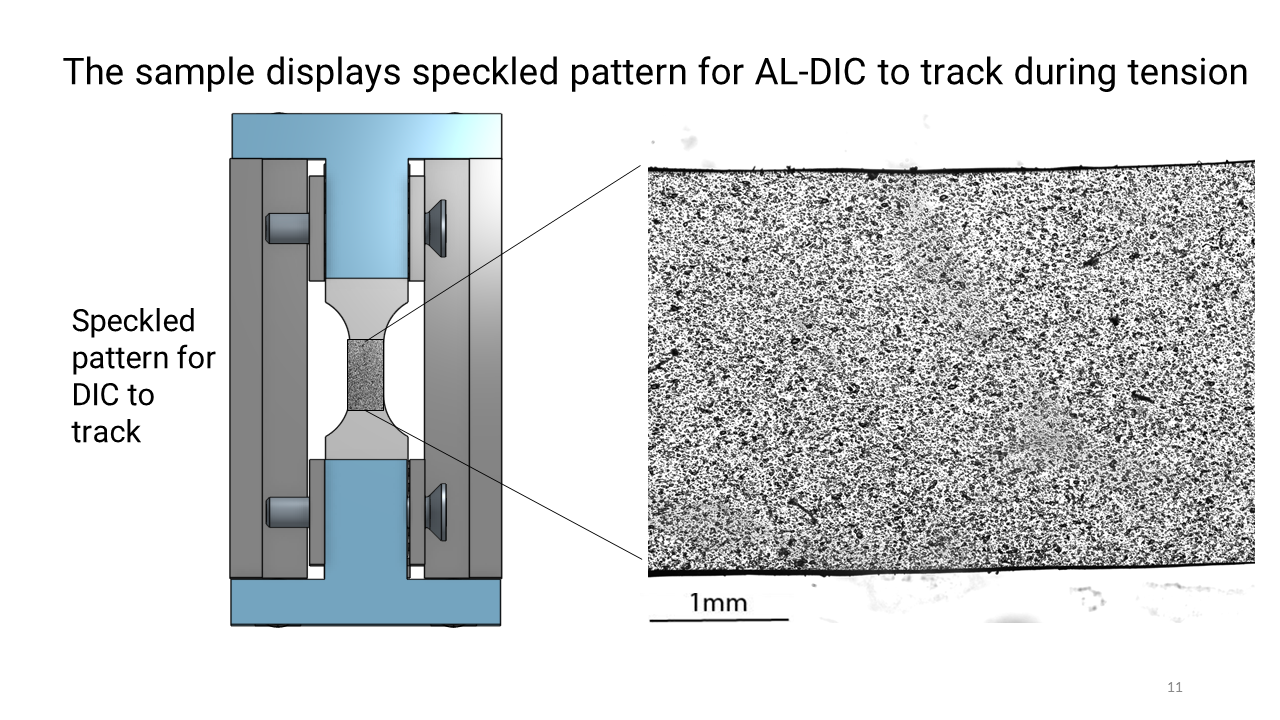
So for AL-DIC to measure the displacement across the sample, the sample was sprayed with black ink to create a speckle pattern. This is what it looked like before the stretch on the microscope with 4x objective.
As you can see here, the sample is stretched from both directions and was imaged during each interval as you can see in the video shown below.
The images then were used as input to AL-DIC and this was the result. The strain fields were pretty uniform. The average strain was also plotted for each interval as you can see here in the top right, it is very linear. The strain in x and y direction were also plotted here to compute the Poisson’s ratio by fitting a line to the data points. Here, the computed Poisson’s ratio was 0.32 compared to 0.47 for silicone rubber in literature.
So now that the device is validated, what are the next steps? Before I jump into deep learning, I would like to talk about how all these parts come together. So with my 2D uniaxial tension device, I can stretch cells at low-rates. But how will I be able to identify the phenotypes inside this cell culture so that I can understand the injury mechanism better? This is where deep learning comes in. We would like to use it so that it can tell us what the phenotypes are in the culture with only this image as an input into the system.